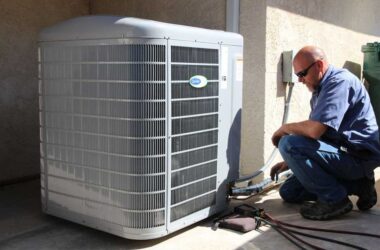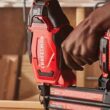


Think you can just load up a nail gun and start firing? Not quite. While nail guns might seem straightforward, they come with real risks and responsibilities. They’re powerful, fast, and efficient, but without a solid understanding of how to use them safely and correctly, you could damage your project — or worse, yourself.
If you’re a DIY enthusiast or just getting into home improvement, it’s essential to treat nail guns with a bit more respect than your average hammer. Let’s break down what you need to know before you ever pull that trigger.
Understand the Types of Nail Guns
Not all nail guns are created equal. They’re designed for specific tasks, and using the wrong type can lead to frustration, poor results, or damage to your materials.
Here are the main types you’ll run into:
- Framing nailers– Best for heavy-duty construction work like framing walls or building decks.
- Finish nailers– Used for more delicate tasks like molding, trim, or cabinetry.
- Brad nailers– Perfect for fine detail work such as attaching lightweight trim or small wood pieces.
- Roofing nailers– Designed specifically for securing shingles and other roofing materials.
- Flooring nailers– These are specialized tools made for installing hardwood flooring.
Before you even buy a nail gun, think carefully about the kind of work you’ll be doing. A framing nailer is completely overkill for crown molding, just as a brad nailer will be useless for building a fence.
Know Your Power Source
Most nail guns are powered in one of three ways: pneumatic (air-powered), electric, or gas. Each type has pros and cons depending on your needs.
Pneumatic nail guns use an air compressor and tend to be more powerful, making them a popular choice for professionals. However, they’re less convenient for casual DIY work because they require an air hose and compressor.
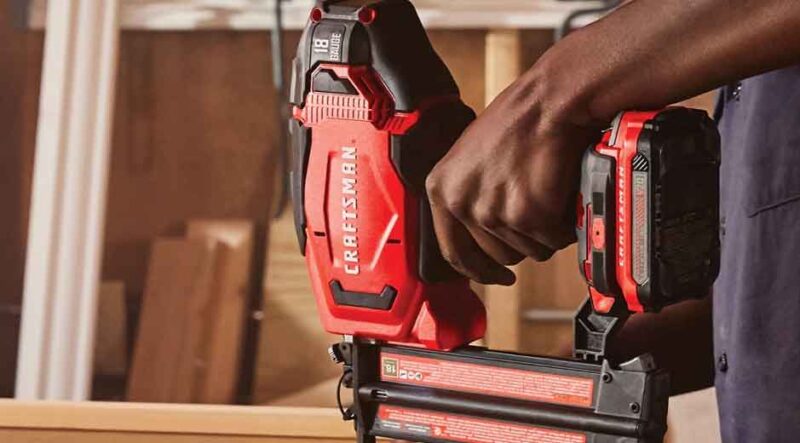
Electric nail guns are either corded or battery-powered. They’re much easier to carry around and don’t require extra equipment, which makes them a great choice for light to medium-duty work.
Gas-powered nail guns sit somewhere in the middle. They’re portable like electric ones, but offer more driving power. The trade-off is that they tend to be more expensive and need fuel cartridges, which adds to the cost and maintenance.
Safety Isn’t Optional
A nail gun can drive a nail through wood in a fraction of a second. That same force can easily penetrate skin, bone, or even ricochet and hit an eye. Misfires and accidental discharges happen more often than most people think.
Here’s what every DIYer should always do:
- Wear protective gear– Always use safety goggles and, if you’re working with loud models, ear protection.
- Use the right trigger type– Nail guns can come with either a contact or sequential trigger. The sequential option is safer because it requires a series of steps before firing.
- Never bypass safety mechanisms– Some users try to remove or disable guards or tips to speed things up. Don’t do it. Those features are there for a reason.
- Keep hands and body parts away from the firing area– Seems obvious, but injuries often happen when someone tries to steady a small piece of wood too close to the line of fire.
- Disconnect power when not in use– Whether it’s unplugging the cord, removing the battery, or releasing the air hose, make sure the nail gun is inactive when adjusting, loading, or storing.
Being cautious doesn’t slow you down. It prevents accidents and keeps your project moving forward without interruptions.
Learn How to Load and Fire Properly
Using a nail gun isn’t just point and shoot. It takes a bit of technique to get clean, accurate results.
Start by reading the manual. Yes, it’s boring. Do it anyway. Every model is slightly different, and there might be small quirks or steps that aren’t obvious.
When loading nails, double-check that you’re using the correct size and type for your gun. Forcing the wrong kind into the chamber can jam the tool or damage it. Always follow the loading instructions exactly.
As for firing, practice on some scrap material first. Angle, pressure, and timing all affect how the nail lands. Too much pressure, and the nail might sink too deep. Too little, and it won’t go in all the way.
Watch Out for Common Mistakes
Even seasoned DIYers make errors with nail guns, especially when rushing through a job or switching between tools. Here are some of the most frequent missteps to avoid:
- Double firing– This happens when the gun bounces and shoots two nails instead of one. It can split wood or create a serious hazard.
- Overdriving– When a nail sinks too deep, it can weaken the joint or ruin the surface. Adjust the depth settings as needed.
- Misfiring or jamming– Usually caused by loading nails incorrectly or using the wrong type. Clear jams immediately, and never try to force a stuck nail out with the trigger still active.
- Angling improperly– Firing at the wrong angle can cause the nail to exit the side of the wood instead of going straight through.
Take your time. It’s better to do the job right once than redo it because of a careless error.
When to Put the Nail Gun Down
Sometimes, it’s better to go old school. Nail guns are great for speed and power, but they’re not always the right tool.
If you’re working on small, delicate materials, or in tight corners where a nail gun can’t fit safely, consider using a hammer or other fastening method. The goal isn’t just to work fast, it’s to work well.
Final Thoughts: Build With Confidence, Not Assumptions
Nail guns are impressive tools, but they’re not foolproof. Just because they make a job faster doesn’t mean they make it easier or safer automatically. They demand a bit of planning, some practice, and a lot of respect.
Before your next project, take the time to choose the right nail gun, learn how to use it properly, and stay aware of your surroundings. That extra care is what turns a DIYer into someone who builds like a pro.